Category Archives: All Articles

Setting up a Makibes (Waveshare) 1024×600 touchscreen with your Raspberry Pi Zero

I have been eyeing a touchscreen to go with one Raspberry Pi from my collection (O_o), for a while now. The official Raspberry Pi screen is perpetually out of stock and backordered for months. The resellers are charging a hefty markup.
Only option left was a third-party screen. After a lot of deliberations I settled down on this screen by WaveShare http://www.waveshare.com/wiki/7inch_HDMI_LCD_%28C%29

My criteria were:

  1. Atleast 7 inches (plan to use it as a dashboard at some point)
  2. Capacitive touch (Resistive touch isn’t as responsive, blame iPhones for ruining us ;-)…)
  3. Least number of addon boards to keep things compact
  4. Works with stock Raspbian.

From the looks of it, the WaveShare screen checked all the boxes though the last point is still debatable.

It is available from multiple resellers on Amazon. I bought it via In4dealz and fulfilled my Amazon. They were offering a stand and frame for 6 GBP extra. Total cost 46 GBP. Plus, I bought an Anker Astro E1 external battery pack to power the thing. It’s 5200 mAh and should be able to power the Pi for a while.

WP_20160103_15_55_04_Pro

Here are the unboxing images:

As you can see they come in a neat bundle, well packed but devoid of any instructions what-so-ever. Even for the frame and stand you have to use your ‘imagination’ to put things together which isn’t too bad for the tinkerer in you.

Setting it up to work with the Raspberry Pi Zero

The sequence I am writing here isn’t the same in which I got things working, but things got really simple after I RTFM 😉

Anyway I will not repeat the mistakes here.

Before you start off make sure you have the latest Raspbian Jessie image setup and running for your Pi Zero.

  1. Assuming your Pi Zero is connected to a regular monitor and able to access the internet. Navigate to http://www.waveshare.com/wiki/7inch_HDMI_LCD_%28C%29
  2. The Drivers you need are at the bottom of the page (section 5.6) or http://www.waveshare.com/wiki/7inch_HDMI_LCD_%28C%29#Drivers_for_Raspberry_Pi
  3. If you are setting up the Pi Zero get the B/B+ drivers for version 4.1.13x. Its about 20 MB download.
  4. Once it finishes extract the tar file
    1. sudo tar zxvf filename
  5. Before you run the executable make sure max_usb_current=1 is setup in the /boot/config.txt file.
    1. sudo nano /boot/config.txt
    2. Scroll to the settings and either uncomment the max_usb_current line or add it in a new line at the end of the file.
    3. Exit nano (Ctrl +x)
  6. Now change into the extracted folder (big massive name starting with RPIB+.).
  7. Execute the installer
    1. sudo ./USB_TOUCH_CAP_7.0_RASPBIAN
  8. It takes about 20-30 seconds and reboots automatically.
  9. Let it reboot.
  10. Shut it down. If your regular monitor freezes on reboot, hot unplug the power
  11. Connect the Pi Zero’s HDMI out to the LCDs HDMI in using the Pi Zero’s adapter and the provided flat HDMI cable.
  12. Connect the Pi’s Micro USB to the LCDs Micro USB connector via the provided adapter + cable.
  13. Power up and you are good to go :-)!
  14. If you have an older Raspberry Pi running a version of Raspbian Wheezy, then get the version 3.x drivers. The screen works with them too.
  15. You can install a software keyboard called matchbox-keyboard using apt-get, but I have doubts about it because it seems to consume a lot of CPU resources and even after you have closed it doesn’t release resource (quickly). I haven’t used it a lot though, so I’ll give it another go later.

Assembling the frame/stand

If you bought the additional frame/stand you can assemble it as shown in the slideshow below. The Pi Zero does fit horizontally towards the top of the frame!

And that’s it, you are all set.

I powered it using the Anker Astro E1 battery pack. You can do something similar to keep it portable.

I ever get to making this into a portable/carryable ‘tablet’ I shall post updates here :-).

EDIT: As suspected the ‘drivers’ provided by the vendor don’t work once you update your Raspberry Pi image. I had found a PHP driver that worked initially, but with the latest update of Raspbian that’s broken as well. As of now it is a non-touch screen till I am able to tinker with the PHP driver and get it back online.

However, to get it working with any stock Raspbian as a screen, all you have to do is add the following lines at the bottom of your config.txt.

After you have burned the image to an SD card you can simply add the following lines in the config.txt before you put it in the Pi. This way you don’t need a separate monitor to get going.

max_usb_current=1
hdmi_group=2
hdmi_mode=1
hdmi_mode=87
hdmi_cvt 1024 600 60 6 0 0


Tagged , , , , ,

Getting started with NodeJS – Part 1: Fumbling around

I’ve been meaning to try out NodeJS for a while now, and finally got around to doing it over the last few days. I thought I would share my experience as I go along.

Update: Those ‘few days ago’ are actually a couple of months now 😉

I have used NodeJS as a (build) tool to help me ‘compile’ front-end scripts, that involves taking dev source code and minifiying it into cache-busted deployable code. I use gulp for it and it works pretty okay. Fact is, while writing the gulp script I got pretty interested in NodeJS.

Also given the fact that ASP.NET vNext is pretty much going the ‘Node way’, I thought I should know what the real deal is, before I muck around with ASP.NET vNext.

So here is my first go at building ‘something’ using NodeJS as a platform as opposed to just a Dev/Build tool. The article expects you to have heard of NodeJS and NPM (Node Package Manager, something like Nuget but runs off the command line and available to both Windows and *nix). If you have never used either of them, it’s fine.

Environment

OS

Debian 8 (Jessie).

My readers using Windows fear not, you can use NodeJS on Windows using nearly the same steps, so if you get stuck just let me know and I’ll try and help.

NodeJS:

node --version

v4.2.1

npm --version

2.14.7

Side note on upgrading Node in Debian: If you read my previous article I had mentioned Jessie comes with a Node package by default, but it’s a rather old one. I un-installed that one using

sudo apt-get remove nodejs

Thereafter I followed the step outlined on Nodejs.org . Reproduced here

curl -sL https://deb.nodesource.com/setup_4.x | sudo -E bash -

sudo apt-get install -y nodejs

This basically downloads the latest package from the official node repository and installs it.

Windows Users: Just get the latest Node installers from nodejs.org and rock on! NPM is installed as a part of Node.
OSX Users: You guys are all good, just install Node and the rest of the commands should be all the same.

IDE/Editor

Well, you could use anything you want, starting with Visual Studio full on, to Visual Studio Code, or any other IDE/Editor that suits your fancy. I am using Atom by Github. I am new to Atom as well, so there might be some moments when the experienced Atom user in you wince at my noobish-ness.

The Project

Well, I want to figure out what it takes to use QuillJS wrapped in a KO Component and then save the text in component into Azure Blob Storage. Simple right ;-). The project is called ParchmentScroll. Why? Well you use quills to write Scrolls on Parchment paper… 😉 😉 😉

Oh, BTW, QuillJS is a really cool JavaScript library for add Rich Text capabilities to your Web Application. It was open sourced by Sales Force and is available under a permissive BSD license.

So lets get started, but before that lets try wrapping our head around ‘Server-side’ JavaScript.

JavaScript… umm… TypeScript everywhere (client-side and server-side)

You either love JavaScript or loathe it! I have made my peace with it and I kind of like its dynamic quirkiness. After I started using TypeScript I like JavaScript even better.

Anyway, traditionally we all know how to use JavaScript in the browser. But Node JS takes JavaScript and runs it through Google’s V8 engine on the server so you can actually write HTTP services in JavaScript. So you can have a HTML page hosted on IIS, NGINX, Apache or wherever, do an AJAX post to your NodeJS application that you’ve written in JavaScript and send back a response. To put things in contrast with the .NET world, think of writing Web API services, but instead of writing ApiControllers in C# you get to write it in JavaScript.. err TypeScript!!!

Down to some code… err well… kind of

Since I am using Atom, a lot of the steps I describe here, to setup a blank project, will look long drawn, when compared to Visual Studio’s File->New Project->Wizard->Done.

So lets get started.

Open a terminal.

Select/Create your favourite project folder and navigate to it. Mine is at

cd /home/sumitkm/myprojects/demo/parchmentscroll

Packages, their managers and Node JS

The NodeJS ecosystem thrives on a huge repository of third party libraries that are distributed as packages. Packages inherit the idea of Linux packages. They bundle self contained units of code/binaries that can be installed and updated using their respective package managers.

In this project I have used three package managers

1. The Node Package Manager aka npm – This is Node’s default package manager and is used to distribute all node packages, binaries and extensions. Fun fact, you use npm to install other package managers :-). So npm is the alpha dog of package managers in Node and is installed by default with Node. Node packages are mostly used for installing dependencies that you will use on the server side. For client side Script/style dependencies you use the next package manager – Bower.

2. Bower – The front-end package manager. Bower installs front-end dependencies that are mostly distributable versions of the libraries or frameworks that you will use e.g. KnockoutJS, RequireJS, QuillJS etc. To get started with Bower you first need to install it using npm at the global npm repository location as follows.

Please note if you are are not the administrator but have sudo-er rights, you need to prepend sudo to every shell command unless I say you don’t need one explicitly.

npm install bower -g

3. TSD – The TypeScript Definitions package manager. While the good thing about TypeScript is it provides better code management due to type enforcement at compile time, the flip side is you need TypeDefinitions for existing libraries written in ES3-4. DefinitelyTyped is a nice Open Source repository of TypeDefinitions that users have contributed as they have used existing libraries. While creating a TypeDefinition is relatively easy, its good to have a leg up with the existing libraries. So we install TSD a package manager that helps you retrieve type definitions for libraries you will use from the DefinitielyTyped repository

npm install tsd -g

We start by initializing an NPM ‘project’. This creates a package.json file which has the list of dependencies as well as details like the Project Name, version, Git repository, Author name, License information etc.

npm init

(don’t use sudo here)

This will present you with a series of prompts where you provide the requested details and it will in turn scaffold a package.json file for you. I provided the following details:

This utility will walk you through creating a package.json file.
It only covers the most common items, and tries to guess sensible defaults.
See `npm help json` for definitive documentation on these fields
and exactly what they do.
Use `npm install  --save` afterwards to install a package and
save it as a dependency in the package.json file.
Press ^C at any time to quit.
name: (parchmentscroll) 
version: (1.0.0) 
description: A blogging platform built using Node, QuillJS and TypeScript
entry point: (index.js) 
test command: 
git repository: https://github.com/sumitkm/parchmentscrolldemo/
keywords: QuillJS, NodeJS, TypeScript
author: Sumit Kumar Maitra
license: (ISC) MIT
About to write to /home/sumitkm/myprojects/demo/parchmentscroll/package.json:
{
  "name": "parchmentscroll",
  "version": "1.0.0",
  "description": "A blogging platform built using Node, QuillJS and TypeScript",
  "main": "index.js",
  "scripts": {
    "test": "echo \"Error: no test specified\" && exit 1"
  },
  "repository": {
    "type": "git",
    "url": "https://github.com/sumitkm/parchmentscrolldemo/"
  },
  "keywords": [
    "QuillJS",
    "NodeJS",
    "TypeScript"
  ],
  "author": "Sumit Kumar Maitra",
  "license": "MIT"
}
Is this ok? (yes) yes

If you do ls now, you’ll see that a package.json file exists in the folder.

Here on, you have to decide your project structure. There are lots of sensible defaults, you can look up on the net. I am trying out one that I feel comfortable with. I may change it as we go along and build the project.

Since there are no csproj files or equivalent (package.json is a distant cousin, more like a .sln file than anything else), I am going to create top level folders as projects. So I create two main folders

(no sudo required)

mkdir www

mkdir server

Next will initialize the typescript definition file tsconfig.json
(no sudo required)

tsc --init

This creates a TypeScript config file that helps TypeScript compiler with location of the ts files in the project and other configuration items. If you open the file in an editor you’ll see the default:

{
"compilerOptions": {
"module": "commonjs",
"target": "es3",
"noImplicitAny": false,
"outDir": "built",
"rootDir": ".",
"sourceMap": false
},
"exclude": [
"node_modules"
]
}


The compiler options are same ones available via command line. I tend to remove the outDir attribute completely. This results in the .js files being generated in the same folder as the .ts file. This fits better with my deploy script that we’ll see sometime in the future.

The exclude array tells typescript compiler which folder it shouldn’t look at. Currently only node_modules is excluded.

The final tsconfig.json file we are starting with is


"compilerOptions": 
 {
  "module": "commonjs",
  "target": "es3",
  "noImplicitAny": false,
  "rootDir": ".",
  "sourceMap": true
 },
 "exclude": [
   "node_modules"
  ]
 }

This completes our ‘File->New Project’. Here on we’ll get on with some real code.

Application layout in a little more details

In the previous section we created two folder server and www as our two ‘projects’. The server folder will be root folder for all the server side logic and the www folder will hold whatever resources the browser needs to serve up the web page. So folder names basically help us with a mental segregation of what goes where.


Node JS can open ports and server content on ports if you want it to. But we don’t want to go that low level. Instead we’ll get help from a framework called Express JS to the low level stuff of opening/listening to ports, parsing requests, sending back responses etc. Basically we’ll use ExpressJS to bootstrap the application. The handy bit is, Express can serve up static files as well, so we’ll use the same framework to host the front-end and handle backend request/responses.

Down to some code, finally!

Getting started with ExpressJS

Setting up anything in node basically means npm –install. Express is no different. In the ‘parchmentscroll’ folder using the following

npm install express --save 

Save tells npm to update the package.json file with this particular dependency. So when you get sources on to a new folder all you have to do is npm install and all dependencies listed in package.json will be installed for you.

Time to start up Atom in the parchmentscroll folder enter

(no sudo required)

atom .

This should launch atom with the following layout

new-project-atom-editor
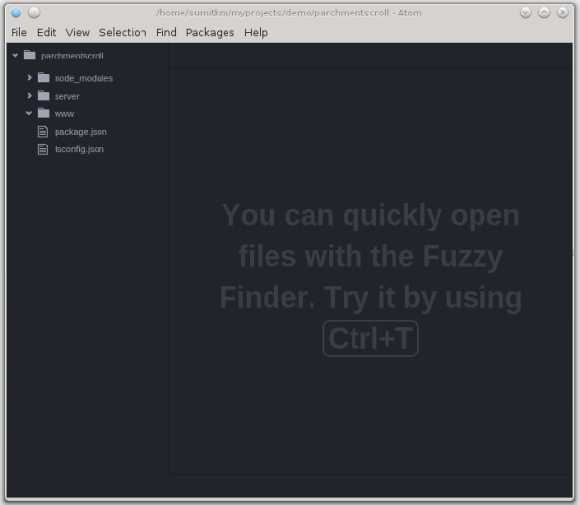
Under the server folder create a folder called app

Add app.ts file under app folder. This is going to be our entry point into the application.

But before we start writing code, we need a little more ‘configuration’ to do.

Back to the console in the parchmentscroll folder we’ll use the tsd package manager to install typescript definitions for node itself
(no sudo required)

tsd query node --action install --save

This tells tsd to look for the node type definition and if found install it and save it to tsd.json

Similarly we install typedefinitions for ExpressJS as well

ts query express --action install --save

Next we’ll install a couple of npm modules that Express JS uses for parsing a request body and serving up static files.

npm install body-parser

npm install serve-static

We also need the typescript definition for these two, so invoke tsd again –

tsd query --action install serve-static --save --

tsd query --action install body-parser --save --resolve

Note the — resolve flag that we’ve used in the above two commands. This tells tsd to resolve sub-dependencies of the library and get their type-definitions as well. You’ll note both use another dependency call mime that gets installed automatically.

Back to Atom in app.ts paste the following code and save the file.

/// <reference path="../../typings/tsd.d.ts"/>
import * as express from "express";
var app = express();
var bodyParser = require('body-parser');
app.use(bodyParser.json()); // for parsing application/json
app.use(bodyParser.urlencoded({ extended: true })); // for parsing application/x-www-form-urlencoded
app.use(express.static('www/'));
var server = app.listen(3001, () =>
{
 var host = server.address().address;
 var port = server.address().port;
 console.log('Example app listening at http://%s:%s', host, port);
});

– This code initializes express.
– Initializes an instance of the body parser module and sets it up to handle HTTP request body of type application/json

– Sets up the bodyParser module to handle parsing of url encoded HTTP requests

– Sets up express to handle static files in the ‘www’ folder (which is currently empty).

– Finally it setup up the express instance to listen to port 3001 and once the server starts print out a console message.
With the code setup, switch back to the terminal and in the parchmentscroll folder run tsc.

tsc 

The code should compile silently and come back with no messages.

Next we try to run the app using the following command

node .

The . tells Node to use the package.json to start up. However you’ll get an error at this point.

Error: Cannot find module '/home/sumitkm/myprojects/demo/parchmentscroll'
at Function.Module._resolveFilename (module.js:338:15)
at Function.Module._load (module.js:289:25)
at Function.Module.runMain (module.js:467:10)
at startup (node.js:136:18)
at node.js:963:3

This because when we setup our package.json we said index.js was our ‘main’ file. Problem, easily fixed, switch to Atom and open package.json.

Set the “main” attribute to “server/app/app.js” instead of the initial “index.js”.

Save the file and flip back to the terminal. Run node . Again

node .

This time you should see a message like the following:

Example app listening at http://:::3001

If you open your browser and go to localhost:3001/ you’ll get a message saying “Can’t GET /”

So switch back to Atom and add a file under www called
index.html.

Add a bit of hello world markup

<!DOCUMENT>
<body>
Hello Node JS
</body>

Save the file.

Refresh the browser and voila!


first-node-js-hello-world
Phew! Lot of work for a Hello World!

To sum up…

That may have seemed a lot of work up-front but all of it can be automated and scaffold-ed if we wanted to. Open source tool chains are much lighter weight when compared to enterprise apps like Visual Studio. However, they give you a lot more freedom to mix and match and hey all of them are actually free without you signing away your keystrokes in some EULA.

We have not even scratched the surface on NodeJS yet. In the next part, I’ll jump straight into more real life Node JS concepts like routing and middleware and show how to build front-end clients as well as HTTP services using it.

To be continued… (oh and wish you all a Happy new 2016)!

Tagged ,

Pulling the plug (on Windows10) and moving to Linux on my desktop

If you have followed my recent posts, you know I am working on this experiment on what it takes to wean myself off non Open Source OSes. Over the past weekend I decided it was time to walk the talk and pull the plug on Windows 10 on my Desktop. To be honest, it is not possible for me to avoid Windows 10 because my current Dev platform at work is heavily dependent on Windows (and Visual Studio), but the experiment is to see if I can avoid using Windows/OSX when not working and for my hobbies. So far there are some glaring gaps in my requirements (that I know have solutions but), I used to skirt them by going back to Windows, so I decided lets pull the plug and then figure out how to solve those issues. So here’s how I went about it.

Virtualizing current Windows system

I wanted to convert my current desktop into a VM and then pave the machine to run Debian Jessie. Luckily I have two Disks – a 250 Gig SSD for OS and software and a 1TB HDD. This makes things really easy. If you don’t have a second disk, have a spare external disk with lots of free space.

Using Disk2vhd to create VHDs out of your current Windows system

Turns out Microsoft (Sysinternals) has a fabulous little utility called Disk2vhd.

Download it-> run it -> point it to the Disks that you want to convert to VDHs and provide an output folder. Default output folder is where you are running the util from.

I planned to created Virtual Box VM out of my VHDs, but it supports VHDX only in readonly mode, so I unchecked the ‘VHDX’ option in Disk2Vhd before I initiated the creation so that I can use the VHD directly in Virtual Box on Linux.

Note: If you used the D: of your system for storing files it’s worth including it in the VHD. I made the mistake of not including it, and as a result later with Windows started up, it was iffy about OneDrive, because I had moved all my account folders to the D:. There is no data loss but just that you’ll have to run some hoops to get the VM doing exactly as it was on the Desktop.

Once the VHD creation is complete, you are good to go. This is actually a very good way of backing Windows up, wonder why I didn’t do it more often in the past. Anyway, done now.

Installing Debian with KDE Plasma

In the past I have played around with Cinnamon as my Desktop of choice, though on the laptop I installed Cinnamon and KDE. In such a setup Cinnamon was the default but it had KDE apps around. This time I wanted to go all KDE and see their Plasma desktop in action. So I installed KDE only when asked for choice of Desktops.

When I logged in the first time I was very impressed with how smooth the Desktop experience was. It has elements of Windows, OSX and Gnome in it, but it is really really refreshing.

Cinnamon supports all the Windows shortcuts by default like WinKey to bring up Start Menu, WinKey + E for File Explorer and so on. KDE seems to need a bit tweaking to get it to work like Windows, maybe it has OSX keys by default, not sure. Anyway, I was easily able to support Winkey + Left or Winkey + Right for window align and WinKey + R for bringing up the Application Search. WinKey doesn’t bring up anything on its own though (yet).

Though Konqueror is the default Browser on KDE, I setup IceWeasel (Firefox for Debian) as my default.

I think I like Plasma, but time will tell if it’s just the new fangled toy syndrome or if it will actually help be more efficent than Windows or OSX.

Restoring Windows and a major SNAFU

Once I got Debian going I set it up using the steps in my previous posts. That went smooth.

I followed the official Debian documentation to install VirtualBox.

On VirtualBox I created a new VM and selected ’64Bit Windows 8.1′ and pointed it to the VHD I had created using Disk2Vhd earlier. (I did make a copy of the original VHD knowing its the only way to get back my Windows Machine if anything went south). I had to give the VM 8 Gigs of RAM and selected ICH9 chipset for Windows to recognize the Sound Card correctly.

However after Windows 10 re-initialized itself and came back, it refused to activate saying the ID had been blocked. Now I didn’t put in a Key for Windows 10 specifically, I had upgraded from Windows 8.1. But Windows kept refusing to recognize the 8.1 Key. So currently I have a working VM that’s not activated. This possible means I’ll have to repave the entire machine and go back to Windows 8.1 (which wouldn’t be so bad actually). But that’s for another day. This is just a heads up, Microsoft doesn’t really want you to move your Windows license anywhere other than where its installed even if it happens to be the same machine where you had it initially. This is the type … oh well, I promised myself I wouldn’t rant, so stop.

Replacing OneDrive

A cloud synced storage platform is the only thing I need to do my work efficiently. While I could easily use DropBox as a paid replacement for OneDrive, I lost bit of faith in DropBox with their policy changes in the past.

So I am working on a little project of my own that allows me to maintain a cloud repository of important files (mostly pictures of scenery I capture ;-)…) . It’s tentatively called KalliopeSync and uses Azure (I know about the irony) Blob storage at the moment.

The cost of using Azure Blob Storage for my files is less than to cost of a latte per month. So I tell myself on a random day of the month, that today I am paying for my cloud storage and skip the latte ;-). There you go, free cloud storage 🙂 🙂 :-).

It adds to my long list of personal projects, and yes, this CommitStrip is meant for me, but hey, its the idea that counts… or maybe not, whatever!

Looking ahead

I am hoping, by forcing myself to move out of my comfort zone I will be able to explore Linux more and help me expand my toolbox of Web Development tools/technologies and platforms.

I don’t hate Microsoft or anything, just that with Windows 10 we’ve come to an ideological crossroad that forces me to take the path less traversed. If Windows ever came with a “Leave me alone” button that, in a single click, transferred ownership of my computer and data back to me, I would happily pay for it and use it. Till such time …

P.S. I will miss Live Writer… hope it gets open-sourced some day…

Tagged , ,

Linux on Mac Update 1: Fixing Kernel Panic issues in Debian Jessie

In my previous articles I had explained how I installed Debian Jessie on my Macbook Pro and set it up to do .NET work. I had mentioned in the same about some crashes I had encountered. At the time of writing that, the crashes had seemed one-off and manageable, but soon after things changed drastically.

I had kernel panic issues almost every 15 minutes of use.

I just couldn’t figure out why. In desperation I un-installed the Broadcomm drivers for wireless. This may have helped a trifle in the sense I had crashes every 30 minutes instead of 15. Again it could be the change didn’t make any difference at all.

Most searches pointed to hardware issues. I ran memtest from a bootable USB, fearing the worst, but that passed too.

Now I was getting desperate. Only other ‘hardware’ thing left to do was change the thermal paste on the CPU/GPU failing which, abandon Linux.

Unwilling to accept that, I continued my search and finally hit a few forums where they suggested using Nvidia drivers instead of noveau that comes with default. Thing with Nvidia drivers is that… well they are from Nvidia and hence not ‘free’ as in GPL compliant. But I was desperate to continue using Linux so I went ahead and installed Nvidia drivers as follows:

1. Add the non-free repository URL to apt-get (Skipped this step actually since I already had it added while installing Broadcom drivers earlier, so if you have installed any packages from the non-free repository you don’t need to do this step)

sudo nano /etc/apt/sources.list deb http://http.debian.net/debian/ jessie main contrib non-free
sudo apt-get update

2. Install the following packages

sudo apt-get install nvidia-glx nvidia-kernel-dkms nvidia-xconfig nvidia-settings

3. Setup Nvidia conf for Xorg if you have Gnome shell

sudo nvidia-xconfig

4. Reboot

End Result

Well it’s been a couple of hours now, and the system hasn’t frozen. I’ve done all the things I did with it earlier to see if it freezes e.g. use MonoDevelop, Run TypeScript compiler, use IceWeasel, use Terminal, put it off to sleep, close lid, reopen lid, let it go to screen saver and wake it from screensaver and it has survived it all. I am going to keep it like this for the night and install the wireless drivers in the morning. If it survives that I’ll consider this issue ‘resolved’.

Minor Crib

After installing Nvidia drivers I seem to have lost screen brightness control functions via F1 and F2 buttons. Thought F5 to F12 work (keyboard backlight + multimedia and sound buttons). This would have been okay if Nvidia drivers had not came up with the brightest settings possible for the screen. Had to go into Nvidia’s control panel and dial it down a few notches to stop it from burning my retina 🙂

Left on overnight…

I am very happy to report that the system ran peacefully last night. I managed to configure IceDove to get all my emails and left it on overnight. IceDove managed to get 12 years worth of email headers overnight and there was no Kernel panic. IceDove did run in a tight loop when getting emails so temperatures went soaring and the CPU Fan was hissing angrily for a long time. This nearly confirms the Kernel Panic under stress/high CPU temperatures is not ‘the’ issue. Up next wireless drivers (again), will update back in a few hours.

And the wireless drivers are back…

Well, its been a few hours of running the wireless drivers. Still no issues. Though the computer has been idle most of this time. Other than trying out some themes online, I haven’t done much on it. But I’ve never had this much stability for so long. It used to crash before this. Well then, I’ll mark this issue as resolved!

Up next setting up TRIM for your SSD… I need to look this one up though, not sure you still need it in Jessie!

Tagged , , ,

Getting your Debian Jessie System Ready for .NET work

As a followup to my last post I thought I would continue with my ‘learnings’ on how to go about using Linux. It hasn’t been all sunshine and bunny rabbits. I’ve had multiple crashes and one was so bad I had to re-do the entire OS installation again. I have a nagging feeling it had something to with me trying to install developer dependencies over a dodgy wifi network on the train ;-), I shall not  try that one again to confirm.  There were a couple of secondary crashes that were pretty bad too. I am close to concluding that’s because my laptop’s heating system is botched and I really need to take it apart and reapply the cement for better heat dissipation. Second suspect is the Broadcom wireless driver. Also the ‘close lid’ behaviour is a little odd as it doesn’t seem to go into ‘deep sleep’. It only shuts the apple logo off but its still working along silently. One day I put the laptop in the bag and took it to office, only to realize that it has somehow ‘awakened’ in the bag the my laptop bag was as warm as a heating pad. Now, I manually set it off to sleep before I close the lid (a little Windows XP ish, I know). I shall continue my ‘investigation’ and report back on progress. I am sure it’s my setup somehow. Moving on, today we’ll see what it takes to setup .NET on Linux (aka Mono). Before that I realized I didn’t have wireless drivers. So we’ll start with Wireless Driver installation.

Setting up Wireless on OSX (2009 MBP)

1. The wireless driver is not ‘free’ as per GPL licensing so it is not a part of the default installation. To use apt you have to first add a contrib component to /etc/apt/sources.list. This basically apt where to get the non-free contributions from.

sudo nano /etc/apt/sources.list deb http://http.debian.net/debian/ jessie main contrib non-free

2. Update packages list

sudo apt-get update

3. Install Broadcomm Firmware driver. Note your laptop may have different chip, notably by Atheros. To know more visit https://wiki.debian.org/bcm43xx

sudo apt-get install firmware-b43-installer

4. Reboot

sudo shutdown -r now

5. Once rebooted, the wireless devices should be listed in the system tray, just pick the one that’s yours and connect to it and provide password as required.
I’ve had a couple of crashes after installing this driver, I am not sure if I can attribute them to this driver directly. I will keep looking and update back if I find the root cause.

Setting up Mono and MonoDevelop

As a .Net and C# geek, I need to be able to code in C# on my Linux box. So first thing to do is setup Mono and MonoDevelop. Once we have this in place we’ll look at secondary tools and platforms like Atom editor and NodeJs.

1. Goto Mono’s default guide at http://www.mono-project.com/docs/getting-started/install/linux/ and follow the steps. Repeated here for Jessie on Macbook Pro
2. Add GPG Key

sudo apt-key adv --keyserver hkp://keyserver.ubuntu.com:80 --recv-keys 3FA7E0328081BFF6A14DA29AA6A19B38D3D831EF

3. Add Repository to list of sources

echo "deb http://download.mono-project.com/repo/debian wheezy main" | sudo tee /etc/apt/sources.list.d/mono-xamarin.list

4. Update apt

sudo apt-get update

5. Adding mod_mono repository to list of sources

echo "deb http://download.mono-project.com/repo/debian wheezy-apache24-compat main" | sudo tee -a /etc/apt/sources.list.d/mono-xamarin.list

6. Adding libgdiplus support to Debian Jessie

echo "deb http://download.mono-project.com/repo/debian wheezy-libjpeg62-compat main" | sudo tee -a /etc/apt/sources.list.d/mono-xamarin.list

7. Update apt again

sudo apt-get install update

8. Install Mono Development kit (about 155 MB)

sudo apt-get install mono-devel

9. Install Mono-complete (additional 77 MB)

sudo apt-get install mono-complete

10. Install PCL Support (Portable Libraries, additional 28.2 MB)

sudo apt-get install referenceassemblies-pcl

11. Install MonoDevelop

sudo apt-get install monodevelop

12. Install MonoDevelop NUnit plugin

sudo apt-get install monodevelop-nuit

13. Install Git (One would think Git comes installed with every Linux installation. While this is true for a lot of distributions, we installed from a Live CD installer, so it was the leanest installation possible).

sudo apt-get install git

14. Install MonoDevelop Version Control plugin

sudo apt-get install monodevelop-versioncontrol

15. Install MonoDevelop Database plugin.

sudo apt-get install monodevelop-database

At the time of writing this plugin failed to install with the following error, I have ignored it for now, will revisit if I encounter a pressing need for the plugin.

Some packages could not be installed. This may mean that you have
requested an impossible situation or if you are using the unstable
distribution that some required packages have not yet been created
or been moved out of Incoming.
The following information may help to resolve the situation:
The following packages have unmet dependencies:
monodevelop-database : Depends: libmono-npgsql4.0-cil (>= 1.0) but it is not going to be installed
Depends: libmono-system-data2.0-cil (>= 3.12.0) but it is not going to be installed
Depends: monodevelop (< 5.7.0.660.) but 5.9.5.9-0xamarin1 is to be installed
E: Unable to correct problems, you have held broken packages.

At this point you are setup to create simple .NET applications – both console and MVC.

Setting up NodeJS, PHP and the Atom Editor

The Atom editor, as defined by its creators (at Github), is a Hackable code editor that’s fast becoming the goto tool as opposed to heavy IDEs like Visual Studio/MonoDevelop/IDEA/Eclipse etc. It does use Google Analytics for tracking usage and improving itself. If you are not comfortable with Google Analytics, you can disable the module (and I hope it doesn’t it doesn’t send anything more to Google).

The easy way

The easy way to get Atom is to download the pre-built package from https://atom.io/download/deb# and install it using

sudo dpkg -i atom-amd64.deb

The hackable way

The hackable way of course is to download the entire build tool chain and build it locally. There is a nice set of steps documented here https://github.com/atom/atom/blob/master/docs/buildinstructions/linux.md and it worked for me perfectly. It hot links to NodeJS installation instructions that are a bit redundant at the time of writing, so I’ll just collate everything here:
1. Install Toolchain (note I am not re-installing git here because we did that earlier already)

sudo apt-get install build-essential libgnome-keyring-dev fakeroot

2. Install Node

sudo apt-get install nodejs

3. To avoid conflict with another package node is installed as nodejs. If you don’t have the amateur radio package called Node you can setup an alternative. To first check use the following command
sudo which node If this doesn’t return any values, it means you are safe to setup node as the alternate command to nodejs. You can do this as follows

sudo update-alternatives --install /usr/bin/node node /usr/bin/nodejs 10

Now if you do a sudo which node you’ll see it points to /user/bin/node
4. Install NPM (node package manager) next

sudo apt-get install npm

Clone the Repository
5. Change to your standard projects, folder mine is in /home/sumitkm/MyProjects/github

git clone https://github.com/atom/atom

6. Checkout the latest atom release

cd atom
git fetch -p
git checkout $(git describe --tags `git rev-list --tags --max-count=1`)

7. Build Atom into a custom folder. I created a /build folder under /home/sumitkm/MyProjects/builds

script/build --build-dir /home/sumitkm/MyProjects/builds/atom

This will take a while as it downloads and installs all the packages required to build Atom and then does the actual build. If all goes well, you should have a success message at the end of the installation. Note: If you have not restarted the terminal/console after installing node and the installation fails, restart the terminal and you SHOULD NOT require a sudo to run the script. If you get a deduping error clear out the ../github/atom/node_modules folder using rm -rf.
8. Install Atom as

sudo script/grunt install --build-dir /home/sumitkm/MyProjects/builds/atom

You are now all set to use Atom and also with NodeJS should you want to build NodeJS services.

Looking Back…

I did not expect it to be all sunshine and bunny rabbits when I decided to give Linux a try. But it has not been that bad. The VM on my desktop just works marvellously. The on the metal laptop has a few quirks, that I am sure I can sort out. Linux desktop remains the enthusiast’s OS but it has grown well I’ll say. And of course the amount of documentation out there is also pretty phenomenal. This experiment shall continue well into my new laptop whenever I get it…

Tagged , , , , ,